Thursday, January 21, 2016

Easy DIY Fairy Crowns


My 3 year old asked for a rainbow tiara for Christmas, but we realized pretty quickly that a rainbow tiara that wasn't plastic is pretty hard to find. So we turned to Etsy to see if we could find something handmade, and basically decided that for what they were charging on Etsy we could figure it out ourselves and make something that suited our daughter's taste exactly.

So I set out looking for tutorials, and found a few and tweaked them based on supplies we already had, and set out to make it as easy as possible. This is what I came up with; here's how you can make your very own Fairy Crown.

What you'll need:


You'll begin by making a cardboard form for your crown to set on. Measure the head for which the crown is intended and cut your cardboard 1 inch longer. My daughter's head was 19 inches so I cut a 20 inch length and a 5 inch width to make it a bit wider than my lace. So I cut a 20" x 5" length.


I then made a cylinder and overlapped the ends by a 1/2" and taped it. I then covered the outside in the tape also to create a barrier so that the glue didn't saturate the cardboard.


Next mix equal parts white glue & water together in a container, and soak your lace for about 10 min.


After your lace has soaked, remove it from the glue solution and gently ring out the excess glue. Fasten the lace around your form and secure the ends with a tiny bead of hot glue.


Put your form and lace onto a microwaveable plate, I used a paper plate for easy cleanup. Place the plate and form into the microwave in 30 second intervals until the lace is dry. It took about 5-6 intervals before my lace was dry. Remove the crown from the microwave and use your paintbrush to paint another layer of the glue solution onto your crown and repeat this process until you have reached your desired stiffness. I found 3 rounds/layers of the glue to be stiff enough.


This next step can be omitted if you please. You might like the white, or you might be able to find lace that is already coloured. I chose a metallic paint, and I found that this step made the whole thing even stiffer. You will have to wait for this step to dry the old fashioned way or use a hairdryer, as you don't want to microwave your paint, especially metallic. Remove the crown from the form to paint it. the crown will become a bit limp again from the wetness of the paint.


Once you've painted the whole crown, you can either put it back on the form to dry, or take this opportunity to cover it in glitter like I did. This is the best time for the glitter because it'll stick to the wet paint.


Now for the best part. Once your crown is dry you can EMBELLISH it! With a glue gun I fastened a royal purple velvet ribbon to the base and some rainbow coloured jewels to the points.


We made a second one for her little sister, and I'm thinking I might want one of my own next. Making this adorable fairy crown is super simple, and it can be used for dress or dress-up!


Thursday, March 12, 2015

Travelling With Cloth Diapers?

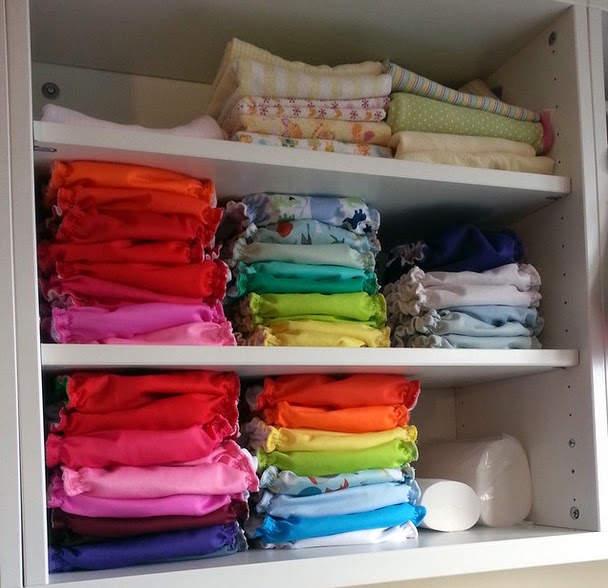
Anyone who knows me knows that I am cloth diaper obsessed, specifically AppleCheeks cloth diapers. Cloth diapering is NOT what it used to be in our Mother's and Grandmother's time. Cloth diapering has come a looong way and has become a huge movement for reasons that are easy to understand; they are cost effective, environmentally friendly, very fashion forward, and highly collectible, and believe it or not cloth diapers actually have re-sale value - can you say any of that about disposables?


This post is not to sell you on cloth, because frankly I think they sell themselves, but to share with you my experience of taking our beloved AppleCheeks with us on vacation.

I will admit to you that before I faced my fear of travelling with our cloth diapers, I always used disposables for travel. My fear was lugging around a bag of poopy cloth in our car, or carry-on bag, or diaper bag. I used to think it was just easier to pack a few disposables and throw them away so I didn't have to deal with carrying the mess around. BUT then we were experiencing blow-out after blow-out in disposables, and well, I ended up having to pack extra sets of clothing, and carry around the poopy clothes anyway - which was more cumbersome than a couple of dirty diapers.

So I took the leap and decided to pack up our diapers for a recent trip to the Caribbean. 

I Packed 15 covers in one wet bag, and 15 inserts in another wet bag. I had 2 in our diaper bag and left with 1 on our girls' bottom.
I also brought 1 large wet bag along to catch the dirty diapers at our destination as needed. 


18 diapers in total considering 1 wash cycle got us through the week with ease. As long as I have access to a washing machine were I'm headed, cloth diapering is a no-brainer now. It so so easy. 


And I don't mind saying that I think she was the cutest baby on the beach. That cute little number is called Appletini by AppleCheeks cloth diapers; she had her cocktail, and I had mine ;)


If I wasn't sold on the whole thing after going through the week with such ease, I was certainly sold after a question from another mom on the flight home. She asked, "how on earth did you find everything for your baby on the island? did you have trouble?".  My response? "I breastfeed and cloth diaper, I didn't need a thing!"

Want to try out AppleCheeks cloth diapers???
Follow us on Instagram for your chance to win 1 of 2 Little Bamboo Bundles from the AppleCheeks Easter release: First Crush and Crazy Love


Wednesday, March 11, 2015

Old Bench Turned Retro Kitchy Play Kitchen

DIY Retro Play Kitchen!

When our then almost 2 year old kept mimicking what I did in the kitchen by bringing us, and anyone who stepped foot in our house, make-shift tea and cookies (usually duplo blocks on a tiny tea set my Aunt gave her) we thought a play kitchen would be the perfect gift for her 2nd birthday. 

So we began looking at what was out there, and we were shocked by how expensive and low quality everything was. Such as these examples from Toys R Us, like this Plastic Palace for $350.00!

Or this low end one still expensive as heck for $120.00!
And let me tell you these picture make them look amazing! In store they look cheaper than cheap. AND have you ever seen these things after they've been played with? Marker and dirt that never seems to wash off of that cheap molded plastic, broken knobs, sun-bleached plastic, peeled off stickers... ugh I hate those things.. and honestly, if they actually cost what they are worth, then maybe I'd have considered getting one for our E. 

So of course hubby and I figured out how to make it ourselves. 
We had an old shoe bench we weren't using anymore and we did THIS with it.


I cannot begin to tell you how fun this was!

Not only does our daughter love it, it was super cheap to make, and it's so so cute!


I made her some play eggs from old plastic Easter eggs, felt, and an old egg carton


And these spice jars. I purchased a pack of six empty jars from the dollar store for $2, raided my spice cupboard, and whipped up these labels on the computer


I made the apron from fabric scraps and a vintage pattern I had, and the oven mitts from this free pattern from ikatbag.com. Here is a great free pattern from AestheticNest.com for an apron.
We grabbed a cheap piece of plywood for the back, and cut a hole in the top of the bench for the sink. The sink is a stainless steal mixing bowl that we had in the cupboard, that I think was originally purchased from the dollar store. 
The tiles, faucet, door pulls, shelf, towel rack and hinges we picked up from the Habitat for Humanity Restore for less than $20. Most of the bits and bobs we got from a jobber store called Active Surplus. We got really creative, like the stove elements are old computer tower fan covers, and the knobs on the oven are old UHF TV channel turners; these items we literally picked up for pennies. 
The wallpaper is vinyl tablecloth material that I picked up for $5 at a local fabric shop. 
The paint was probably the most expensive part coming in at $25 because I had my heart set on these vintage Tomato and Seafoam colours to compliment the theme, but you could absolutely use old paint you have lying around for free, or check out the mistake colours at your local paint store for a discounted price.
The rest of the accessories I picked up at the dollar store. Yes, I found measuring cups, tongs, a whisk, sponges, plaid washcloths to compliment my colour scheme, a mini frying pan, a mini pot, and a spatula all for $1 each! The teaset we already had (it's what started it all - from the Aunt :) )
The small appliances you see where purchased to go along with the kitchen for our daughter's birthday, and just happened to match our design.  
So I would estimate that when all was said and done, this beautiful, custom made, retro play kitchen cost us only about $75 to make, and lots of love :)
Now this is something we will have for years to come, and it's built to last. We are planning a few upgrades already, such as working lights for the fridge and oven!


If you're looking for a fantastically fun to make gift for a little on in your life, I can guarantee this will impress on a budget. 


Friday, May 9, 2014

That Darn Dirty Oven!

I've been letting my well-used oven become a bio-hazard. In not wanting to use any harsh chemicals, because they suck quite frankly, and not wanting to use the self-cleaning option, as it stinks up the not-well-ventilated apartment like a tire fire, I've let it get out of control. Like so bad that it actually caught on fire recently, ha ha!
I stumbled upon a cute little book recently - The Naturally Clean Home, full of lovely recipes for making your own household cleaners. Many recipes make use of essential oils, so not only are they effective, but they smell incredible too. It's a happy little book :)

Of course the book has a few recipes for oven cleaners - so I gave the following a try today:

Serious Oven-Cleaning Formula

  • 1/2 cup salt
  • 1/4 cup washing soda or borax
  • 1 box (16 ounces or two cups) of baking soda
  • 1/4 cup water
  • 3/4 cup white vinegar
  • 10 drops thyme essential oil
  • 10 drops lemon or lemongrass essential oil   
(You'll also need a spray bottle, some rubber gloves, and you'll find it helpful to have a scouring pad or some steel wool)
  1. Combine salt, borax, and baking soda in a plastic or glass bowl. Add just enough water to make a paste
  2. Remove oven racks and preheat the oven to 250ºF for 15 minutes, then turn off the oven and leave the door open.
  3. Carefully spread the paste on oven walls with a sponge or cloth and allow to set for 20 to 30 minutes.
  4. Combine the vinegar and essential oils in a spray bottle and shake well. Spray the oven walls and wipe clean. Rinse well.
With the help of some steel wool (that ended up looking like something you'd pull out of a clogged drain once I had finished) and some serious elbow grease (it helped me considerably that I accidentally broke my favourite tea pot this morning - so I had some pent up angst to use), I was able to get my oven pretty darn clean! Admittedly, it's not fresh-from-the-store clean, but had I a tad more time, and had I broken my Gramma's antique vase, it probably would have been close to new.
With absolutely no foul odor - in fact it smelled pretty darn good - and no irritation to my eyes or lungs or skin, and no harm to my asthmatic husband, my 1.5 year old daughter or fluff-muffin dog - I was extremely pleased with the result. See for yourself! 


If you pop over and visit us on facebook you can enter for a chance to win a copy Karyn Siegel-Maier's book "The Naturally Clean Home". Good luck!

Monday, October 29, 2012

Wool Dryer Balls Baby!

After having Evelyn I changed our laundry detergent to an environmentally friendly, baby friendly, fragrance free, phosphates free, hypoallergenic etc. etc. type - AND stopped using fabric softener. In doing so I lost what I love so much about clean laundry - the scent - and our clothes, towels and blankets became ridden with dog hair that was previously kept at bay by dryer sheets. BOOOO! So I went in search of a solution, and quickly found that people use Wool Dryer Balls in lieu.

Wool dryer balls are just that. A wool ball that you toss into your dryer with your wet clothes. The lanolin in the ball is supposed to soften the clothes naturally, and the balls act as an agitator to reduce drying time. I thought I'd give them a try to see if they worked on our dog hair issue as well.

Okay, I love these things! From different things I've read, it is suggested that you have 6-8 of them to actually do a good job, but in the pack I ordered I received 4 and they do the job just fine. Yes, our clothes are softer. Yes, the drying time is reduced. Yes, our pet hair gets wrapped up in the balls and not on our clothes anymore! Admittedly, they don't work as well as dryer sheets for the pet hair, but they're pretty darn good. I also get my scent back by putting a few drops of vanilla and tangerine essential oils on the balls - also not as fragrant as commercial perfumes, but natural and pleasant; it's not overpowering.
The only issue the balls do not address is static. But I'm willing to live with a bit of electricity in exchange for healthier laundry.

I purchased my balls from MiniMittens on Etsy - This is a crafter from Ottawa - so I also feel great about supporting a Canadian business too.

What a great gift these would make too; paired with a few bottles of essential oils - awesome!

To check out MiniMittens on Etsy click here
To check out MiniMittens on Facebook click here

Tuesday, September 25, 2012

Warming Quinoa Chili!

My good friend Ashley recently posted pictures of some Quinoa Chili that she had thrown together in her crock pot. Her picture looked so yummy, and with Autumn coming in like a lion this year, our house was in need of something hearty and warm to eat - So I asked her how she made it :) Here is her recipe, with a few additions of my own.


Quinoa Chili...mmmmm

2 tbsp EVOO
2 cups dried mixed beans (or two cans drained and rinsed kidney beans or whatever kind you fancy)
1 cup dry quinoa
2 sweet potatoes peeled and cut into chunks
1 large onion chopped
1 large zucchini cut into cubes
2 celery stalks chopped
3 cloves fresh garlic minced
1 cup chopped mushrooms
1/2 cup frozen corn
4 cups veggie stock
4 cups tomato sauce, or 2 cans diced tomatoes
1 13oz can of tomato paste
Chili seasoning to taste (I used 3 tablespoons)
Salt and pepper to taste

If using dried beans, soak them for 12-24 hours in advance (until soft or sprouted)

In a large pot, on med-high heat, add your EVOO, diced onions, minced garlic and chili seasoning - sweat your aromatics for 5 min or until they become fragrant. Do not over cook them.
Add your veggie stock, tomato sauce, tomato paste, beans, quinoa, and all of your veggies. Simmer covered on med-low heat for 4-5 hours, stirring occasionally. Simmer on low heat for an additional hour, stirring occasionally. Add salt and pepper to taste.

This can also be made in a slow cooker - cooked on high for 3 hours; then low for 12 hours.

Garnish with some grated sharp cheddar, and serve with buttered crusty French bread.
Even meat-lovers will love this Chili!

I finished this meal off with an amazing apple pie for dessert - recipe taken from The Pioneer Woman blog.. it's like an apple-crisp tart.. it's delicious! Check it out :)

Monday, July 23, 2012

Another Great Fabric Sale!

For those of you in Toronto area - or those who will be passing through sometime soon - There is a killer sale going on at "King Textiles" @ Richmond & Spadina, downtown.
They're moving, so prices are awesome - and if you can find Jonathan, tell him that Julia from The Retro Nest sent you; maybe he'll be able to help you with an even better deal on your loot ;)

It's only on until July 31st, so get you butts down there before they run out of the good stuff!


Sunday, July 22, 2012

Homemade Baby Wipes!

So I'm about to pop with our first baby, and have jumped into the world of homemade baby wipes :) I decided to go down this path for a number of reasons. #1) there is a long history of very sensitive skin in both hubby and my families - the number one offender being eczema on my side. #2) Cost effective. #3) Environmentally friendly. #4) Super cute fabric options make it fun.

Here's how I did it.

The Wipes

- 1 metre of your favourite flannel, washed in baby friendly detergent and ironed
- Any colour of thread your heart desires - I chose a colour that stood out b/c I used a zig-zag stitch  
  on my sewing machine
- A sewing machine

Cut your fabric into 6"x6" squares


Put two pieces, wrong sides together; stitch all the way around your square with a zig-zag stitch.


Clean up any uneven edges with your scissors - and that's it! Easy peasy!


The Solution

Many of my mom friends use reusable wipes - and most of them use only a flannel with water. But of course I feel the need to be fancy, ha ha - so I did some research into different homemade solutions other people use. I didn't want to use anything too harsh (like tea tree oil or witch hazel) b/c it is afterall going to be used on a sweet little baby bottom, and the idea is to keep it gentle. So from what I've read, a good combo for a gentle solution is simply water, soap and oil. This is mine:

- 3 cups distilled water
- 1 tbsp apricot oil (I chose this one b/c it has natural vitamin E in it - it has no scent)
- 1 tbsp unscented baby wash (I went with Burt's Bees' Baby Bee Shampoo & Wash)
- 2-3 drops rose essential oil (b/c I can't resist a good smelling baby bum)


I have a wipes warmer that I will store the wipes and solution in - and any excess solution I will just keep in a jar until I need to refill!

Tuesday, June 5, 2012

Toronto Woofstock 2012 - the place to be for dog lovers!

If you live in Toronto, or are visiting Toronto this weekend, and you have a dog (even if you don't have a dog), you've got to make your way down to the St. Lawrence Market neighbourhood for Toronto's annual WOOFSTOCK!

We take our Watson every year, and even went before we had her because we love to see all of the different dogs - it's simply awesome :)

Here are the deets:

Saturday June 9th & Sunday June 10th
10am - 6pm daily
Admission: FREE
Where: St. Lawrence Market Neighbourhood


Be sure to visit some of our favourite vendors:

Buddy Belts - The best of the best in harnesses for dogs and cats. Our Watson LOVES hers (so do we)! The best part is that the belts are offered at a huge discount at the Woofstock booth. So if you're in the market for a new harness for your pet, be sure to stop by the booth nice and early because they always sell out fast! This is the belt we snagged for Watson last year and it's been fantastic - check out the video below.


The Hydrant - My favourite place for doggie leashes! Fantastic craftsmanship, handmade, machine washable - and the best part? AWESOME one of a kind prints! Some retro inspired, some contemporary graphics, these leashes are the bees knees. Whenever we're walking with Watson's "Space Babies" leash we are always stopped and asked where we got it. Go visit Lindsay, she's cute as a button too, and she'll love that you stopped by :)

Tuesday, May 22, 2012

"Best Loved Food of the '50's"

I stumbled across this cookbook years ago in the bargain section of the book store. I was captivated by the look of that chicken on the cover, and snatched it up for $5! The book itself is cute to say the least in it's style, the pages are full of retro styling, and the recipes are authentic to the time with it's inclusions of "Spam" and "Jello", to name a few of the '50's kitchen staples used in the recipes.

Admittedly I haven't been through all of the recipes in the book yet - but this past weekend, with it's blazing sunshine made me crave some summer BBQ food, so I reached for this book for some inspiration. Immediately the "Hawaiian Burgers" and "Carmen Miranda Cake" called my name - so I gave them a whirl - they were great! Here are the recipes:

Hawaiian Burgers

1 1/2 pounds ground beef
1/3 cup chopped green onions
2 tablespoons Worcestershire sauce
1/8 teaspoon black pepper
1/3 cup pineapple preserves (I bet an Asian style pineapple dipping sauce would work too)
1/3 cup BBQ sauce
6 Pineapple slices
6 hamburger buns split and toasted

1) Combine beef, onions, Worcestershire and pepper in a large bowl. Shape into six 1/2-inch-thick patties.

2) Combine preserves and BBQ sauce in a small saucepan. Bring to a boil over medium heat.

3) Grill, covered 8-10 minutes (or uncovered 13-15 minutes) until cooked through (160*F), turning and brushing often with sauce. Grill pineapple 1 minute or until browned, turning once.

4) Serve burgers with pineapple on toasted buns.

Broiling Directions: arrange patties on a rack in broiler pan. Broil 4 inches from the heat until cooked through (160*F), turning and brushing often with sauce. Broil pineapple 1 minute, turning once.

*I also added blue cheese to this, mmmmm, And I think next time I will also add bacon as well.


Carmen Miranda Cake

1 1/3 cups cake flour
3/4 teaspoon baking powder
1/4 teaspoon salt
3/4 cup (1 1/2 sticks) unsalted butter, softened
2/3 cup granulated sugar
3 eggs
1/2 cup vanilla yogurt
1 teaspoon vanilla
3/4 cup (6 ounces) frozen tropical fruit punch concentrate
2 tablespoons honey
1 tablespoon dark rum
2 teaspoons cornstarch
2 cups fruit chunks (pineapple, peach, star fruit, kiwi, watermelon, berries, grapes)

1) Preheat oven to 350*F. Grease and flour 8x4 loaf pan. Sift together flour, baking powder and salt in a medium bowl (tip: if you hold your sifter higher above the bowl you will get more air in your flour mixture - makes for a better batter in my experience)

2) Beat butter and sugar iin a large bowl with electric mixer until fluffy. Beat in eggs one at a time. Beat in yogurt and vanilla. Gradually add your flour mixture and beat until blended. scrape down side of bowl as necessary. Spread batter in prepared pan.

3) Bake 50 to 60 minutes or until toothpick inserted into centre come out clean; cool 20 minutes. Turn out onto wire rack to cool completely.

4) Meanwhile, prepare glaze. Combine fruit punch concentrate and honey in a small saucepan. Bring to a boil over medium heat, stirring to dissolve honey. Boil 5 minutes. Mix rum and cornstarch together in a small bowl; stir into hot fruit mixture and cook 1 minute or until thickened. Let glaze cool to room temperature.

5) Set cake on wire rack over baking sheet. Brush thick coat of glaze over cake top, allowing some to flow down sides. Arrange fruit chunks on top. Pour remaining glaze over fruit and cake top. Let stand at room temperature at least 1 hour before serving.

What a fitting name for a cake - it actually is reminiscent of the stunning Carmen Miranda! Love it! The cake itself is delicious and refreshing with all of the fresh fruit! Perfect for a summer BBQ. Enjoy!

Thursday, May 17, 2012

Simple Summer Spaghetti

This month's issue of Better Homes and Gardens magazine lays out a variety of summer recipes that are sure to satisfy the palette and impress your BBQ guests.

Tonight for dinner Hubby and I tested out their "Simple Summer Spaghetti". The article suggests you ask your BBQ guests to bring over their fav farmer's market veggies to grill, and then add them to this super simple pasta. Alas we don't have a grill, but never fear, the recipe is straight forward and adaptable, and it's instructions are for your conventional stove - yay!

Simple Summer Spaghetti

-12 oz. packaged dry spaghetti (we used Tinkyada's organic brown rice spaghetti - love the stuff - gluten free, and doesn't go mushy at all)
- 1/4 cup extra-virgin olive oil
- 5 cloves garlic, coarsely chopped (we smashed it first as well to bring out the oils)
- Pinch crushed red pepper, or more to taste
- 2 cups cut-up grilled zucchini and/or summer squash (we just used raw zucchini, but I can see how grilled would taste better)
- 2 cups red and/or yellow cherry tomatoes, quartered
- 1/4 cup fresh basil leaves, torn
- 1/4 to 1/2 cup grated Parmesan cheese
- 2 Tbsp. chopped fresh basil or Italian parsley

1. Cook pasta according to package directions
2. Meanwhile, combine olive oil, garlic, and crushed red pepper (we added chicken to the recipe - so I cooked the chicken first in the oil, then added the garlic and pepper). Cook over medium heat for 3 minutes, until garlic begins to soften. Do not let the garlic brown. Stir in Zucchini, tomatoes, and torn basil. Season well with salt and pepper.
3. Reduce heat to low and add pasta to skillet with some of the pasta's cooking water. Heat through, and toss with cheese. Garnish with fresh basil.

I served this pasta with a crusty multi-grain baguette  - it was awesome! It took about 15 min to throw it together too, which is great when you're looking for a quick healthy dinner. YUM!

Thursday, May 3, 2012

More Than Just A Yardage Sale

Torontonians, be sure to mark this on your calendars - Toronto Textiles Museum's annual "More Than Just A Yardage Sale" Coming up Saturday May 25th 11am - 6pm; Sunday May 26th 10am - 1pm

You are sure to find amazing fabric remnants here for dirt cheap (I'm talking $1.00 stuff)! Better by far than any fabric store around, and the quality is high end! I LOVE this sale and have picked up some stellar pieces to use for throw pillows, clothing, art projects... and the list goes on.

You don't want to miss this one!

Admission: FREE!

When:  Saturday May 25th 11am - 6pm; Sunday May 26th 10am - 1pm

Where: Toronto Textiles Museum
             55 Centre Avenue
             Toronto, Ontario

            (416) 599-5321
* Take the University Subway to Dundas Station


Tuesday, April 17, 2012

The Wonderful World of Vinegar

First off, I am dedicating this post to my cousin Heather - while she didn't introduce me to the wonderfulness of vinegar, she did discover it herself, and reminded me how awesome it is, and insisted I do a post about it - so I'm tipping my spray bottle to you Heather ;)

My Mom always used a spray bottle of vinegar and water to clean the windows and shine the surfaces at the coffee shop she used to manage when I was a kid. That paired with a coffee filter instead of paper towel for wiping, gave way to the kind of clean glass that birds and people alike mistook for open air.
While she used this formula at work as a means of cutting costs, we still used the chemical versions at home - probably because we fell victim to the marketing myth that harsher chemicals did a better job of cleaning?

Up until about a week ago, admittedly I too was using "Green Works" or other store bought cleaning products to clean my surfaces. When Heather learned of the seemingly magical qualities of vinegar and water, she quickly mentioned it to me, knowing my appreciation for natural alternatives (and magic of course). That was months ago, and in my head I thought "yes, yes, I know" and vowed to give it a try once my other cleaners had run out. It wasn't until the other day when I was trying to clean the mirror in my bathroom that I made the switch. We had a photographer coming in to take pictures of our house, since we're getting ready to sell (baby on the way = need more room) I had thought for months that the streaks I was experiencing on all of my glass was due to the quality of my paper towels - so for this particular cleaning job I switched to coffee filters - no luck, then newspaper - same fate. When both mediums failed to rid me of these taunting streaks - I knew it had to be the cleaner! So I threw some vinegar and water in a spray bottle - and VOILA! Just like true magic, a picture ready, perfect shine, was achieved instantly!  Now I am hooked!

A huge jug of vinegar only costs $0.99 or less in most supermarkets, and won't irritate anything! Safe for humans and animals alike, and shines up those surfaces like nobodies business. Any trace of vinegar smell is gone as soon as it evaporates leaving the smell of, get this... nothing! Not an eye watering potpourri of chemicals masking the left over crap that the cleaner didn't actually clean.

Here are some other great uses for Vinegar:

1) As a toilet cleaner - pour in a cup or so at full strength and let it sit over night to kill germs.
2) As a Calcium/Lime remover - remove calcium/lime buildup from hard water on your shower head, or around your taps. Soak the area at full strength (or add some baking soda) for a half hour or so, and rinse clean.
3) As a laundry booster; stain remover on clothing and carpets - poor into your wash cycle to give it a boost. Also use a spray bottle with 1 part water, 1 part vinegar to spray spots on clothing before washing (just like Shout etc.) can also be used on carpet stains in the same way - just spray on and blot up.
4) As an air purifier - I put a bowl of straight vinegar out on the kitchen counter to take away bad cooking smells that linger after cooking - like frying smells that just won't quit - works like a charm every-time!
5) As a floor cleaner - works wonders on your ceramic tile, laminate floors, linoleum, you name it! 1 part vinegar to 3 parts hot water in a bucket will give your floors a steak-free shine that will make your neighbours gossip :)
6) Of course we also use it for fries, and in our poached eggs, pickling and many other cooking applications. We also use Apple Cider Vinegar both for cooking, and if we have acid reflux - a tsp of the stuff down the hatch cures it instantly!

Needless to say I'll be using vinegar for as many applications as I can going forward. No more wasting money on any store bought cleansers. 
I'd love to learn of more uses for vinegar, or some other natural cleaning remedies that you might have... what are some ways that you use vinegar?

Monday, March 5, 2012

What on Earth is "Oil Pulling"?

While perusing one of my new favourite Mama Blogs - I came across a video about "Oil Pulling". Well at first I was sort of grossed out, but mainly I was super curious! So I began googling, and apparently people have been experiencing some seriously awesome reactions to this little ritual, that I couldn't ignore.
What is it? Well, first thing in the morning (or on an empty stomach) you pop a spoonful of veg. oil into your mouth and swish it around for 15-20 min. It supposed to activate natural enzymes, and pull toxins out of your body through your mouth. Sounds a little hoaky, but people are reporting amazing health results! First and foremost, stellar oral health. Whiter teeth; healthier gums - not to mention story after story of people's accounts of healed gum disease, tooth infections etc. the list goes on. the next most common result was softer, clearer, glowing skin all over the body, specifically on the face, elbows and heals.
There are also reports of cured asthma, headaches, bronchitis, thrombosis, chronic blood disorders, arthritis and other rheumatic diseases, eczema, stomach ulcers, chronic intestinal diseases, heart and Nierenbe complaints, gynecological illnesses, neurological diseases and liver diseases! *

SO, I thought, why not try it out myself?  There's no harm in trying, since it's just oil.. and the worst that could happen is that it makes me gag the first time, and the best that could happen is that I have improved health.

Day 1 - today :) I grabbed a spoonful of organic coconut oil and had a very hard time popping it into my mouth. Coconut oil is great b/c the taste is mild, and it smells great, but it's solid at room temperature, so it was really weird to have in my mouth at first. (most resources suggest sesame oil, so I think I'll be switching to that soon, as I think the texture will be easier on the palette :} ) I had to keep it between my teeth and cheek until it dissolved into my saliva. But, after that, it was easy peasy! 15 minutes of swishing, then I spit it out into the garbage. You wouldn't want to spit into a sink b/c it might clog the drain. I then rinsed with salt water (everything I've read has suggested this b/c there are loads of toxins and bacteria left over in your mouth that you really should rinse out). Then I brushed my teeth like usual. So I'll continue to do this every morning, and take photos every week to track any visual progress (whiter teeth, pinker gums?)  

*Here is the link to oilpulling.com, for more in depth information on this technique.

I'd love to hear if anyone has ever tried this, and their experience with it :)

Saturday, March 3, 2012

Good Ol' Fashioned Dog Treats!

This is Watson, our lovable not-so-little Bernese Mountain Dog. We love her to bits.. and we try our best to provide her with the best we know how, physically, emotionally and nutritionally :)

It wasn't that long ago that kibble was introduced to pet owners as an economical and easy food option for pets, sort of like a TV dinner for pets - it was all about simplifying our daily lives. In fact it was only 60 years ago or so that kibble was introduced. Before then, pets ate table scraps and raw food. So we choose to live by this philosophy with Watson for a number of reasons, and we feed our pupster raw meat and veggies, as well as appropriate table scraps. We still buy "natural" manufactured dog treats for the most part, such as dehydrated beef liver, but today I am going to make our girl some homemade cookies :) They are dead easy, and Watson LOVES them. It's a good thing these recipes make so many, because they won't last very long.

I found these recipes (and adapted them a touch) in a little doggy cookbook called "The Doggy Bone Cookbook"; not only are they super easy, and make a lot as I mentioned, but they are really inexpensive to make.. and if you are a dog owner, you know how much natural dog treats can set you back.. even the crappy ones can cost an arm and a leg :) These cookies also make great gifts for doggy friends!

Peamutt Butter
1/4 cup peanut butter
1 tbsp veggie oil
1 cup water
2 1/4 cups whole wheat flour
1 cup oatmeal

Preheat oven to 375 degrees. In a large bowl combine peanut butter, oil, and water. Gradually add flour, then oatmeal. Roll dough to 1/4 inch thickness and cut with your favourite cookie cutter. Place on an ungreased cookie sheet. Bake at 375 for 35 min. Makes 5 dozen.

Garlick & Cheese
1/2 cup shredded cheddar cheese
2 tbsp butter
1 tbsp garlic powder (or) 3 cloves of minced fresh garlic
1 1/2 cups whole wheat flour
1/2 cup milk

Preheat oven to 375 degrees. Cream together cheese, garlic and butter. Add Milk and flour. Mold mixture into ball and roll dough to 1/4 inch thickness. Cut dough with your favourite cookie cutter and place on an ungreased cookie sheet. Bake at 375 degrees for 30-35 min. or until edges start to brown. Makes 3 dozen.

***A note about garlic. Some professionals say that since garlic is a member of the onion family that it could be bad for dogs; while other professionals recommend it for natural pest repellent such as heart-worm prevention and repelling mosquitoes - studies also show that it is great for a dog's cardiovascular system.  We've been giving Watson raw garlic in her food for years now, and she's thriving. However, please use your own discretion as a pet owner.

Tuesday, February 28, 2012

An Interesting Read... Some More Food For Thought

For those readers who asked me on and off this blog about the Home Birth issue... here is a fantastic blog post I read today in support of home births. It raises a point that I will surely be discussing with my midwife about what happens to baby right after delivery in the hospital.

Mama Birth: The Real Reason I Birth at Home

The link to the video the author refers to is highlighted in blue in her post. I almost missed it :)
Admittedly I watched the YouTube video before reading the post.. and for the first few minutes I didn't know why we were being directed to it.. but as I started to avert my eyes, it quickly became apparent.

It's not necessarily overly graphic, or a "scare" tactic brought to us by granolas lol.. just something I hadn't thought about before.. and most women do not even realize what happens to their babies in the moments after delivery. I never thought to even ask what to expect..

It's food for thought.. go check it out! :)

Also, I encourage you to read the comments after the blog.. Interesting stuff!

Friday, February 24, 2012

Staring Childbirth in the Eyes; Taking Back Control as a Gift to Our Children

As I embark upon my journey as a first time Mom, I have found the learning process thus far to be eye-opening to say the least.
I began my unofficial prenatal education a few years ago. My husband's business was picking up, and I was able to leave my job in business banking to help him out at home. Well I wasn't home a week before my husband dropped the bomb that he was ready to start trying for a baby.
There's never been a question as to whether or not I wanted to have kids someday.. in fact a small army would do - the promise of camp-outs, homemade Halloween costumes, PTA meetings and piano recitals thrills me to my very soul.. but getting a baby into the world was another story all together.

I was a measly 98lbs soaking wet, and the thought of pushing a human out of me made me fear for my life. My experience with childbirth was all holllywood... a sweaty, dishevelled, weak woman lying on her back, holding on for dear life while she screamed bloody murder. A horror scene.. bleh! Not to mention my own Sister in law is sworn off of having children all together because of how horrifying her own birth experience was. All I knew is that it was the WORST thing a woman could experience.
SO, I had a choice. Let fear rule my life, or take the reigns and look this birth thing in the eyes and find out the truth.

It began with my childhood friend Christa suggesting I watch "The Business of Being Born". I was blown away.. seriously blown away. This movie gave me hope that it wasn't inevitable that I have a horrifying birth experience. Click here to read my review/post about BBOB.
From there I began talking to people. Moms who gave birth in hospitals, at home, with an OB, with a Doula, with a Midwife. A pattern began to emerge that shocked me. I hadn't heard one experience that was positive about a traditional hospital/OB birth. Even the moms who said they had a low risk birth, and minimal intervention from the hospital staff, confessed that they were upset that their OB was not who delivered their baby, but a stranger on-call Nurse/Dr. The OB was afterall the person who they'd gotten to know all of these months through their prenatal appointments, their educator in this new life experience, the person who they'd come to know and trust with precious life they were creating. A life experience such a childbirth surely deserves at least the comfort of knowing the person who is handling this precious life for the first time, no? Not one person I talked to who had this experience was comfortable with this arrangement, letting a stranger deliver the baby... so why do we let it happen?

I would certainly be a hypocrite if I did not look at both sides of the coin. So, I made prenatal appointments with both an OB and a Midwife. I planned to sit down with each, have a real, cut-the-crap conversation about my birth experience with each of them, then take the info away, and together with my husband, make a real informed decision about the direction we would take.

I actually had high expectations for the OB. She is the leader in her field at a teaching hospital, young, personable, quite nice. My appointment went something like this:

OB: Hi I'm (the OB)
Me: Hi
OB: This will be a boring appt. it's more paperwork than anything

2 min. of filling out paperwork - me answering routine medical questions like first day of last cycle etc. etc.

OB: Okay, well that's all I need.. let's listen to the heartbeat, and you can go. (Red Flag #1 - this is my 
first baby, I have so many questions, we don't get to sit down and talk for a while? )

We listen to the heartbeat.. it's awesome of course :)

OB: Okay, that's it!
Me: Well I have a couple of questions, can we talk?
OB: Sure.
Me: I'd like to know your thoughts on natural childbirth?
OB: Well childbirth hurts, you're going to want something for it. (Red Flag #2 - no consideration of what experience I want to have. From my education thus far I want to try for a natural birth - no offer of support on this? or at least an offer of supporting information as to why I shouldn't have a natural birth other than "it's going to hurt"? no pros and cons? no open discussion at all? Where do me any my baby come into this "procedure"?)
Me: How do you feel about minimal intervention from the hospital staff if it's not necessary?
OB: If you want minimal intervention I suggest you wait as long as possible to come in when you go into labour. That way you're here at the last minute and we can't do anything else but deliver the baby. (Red Flag #3 - washing your hands of care, and the possibility of coming up with and following a birth plan. Why not just tell me to deliver the baby myself? {which isn't looking like a bad idea at this point} This person is supposed to help me bring a child into this world - what I hear is that this is a medical procedure. This is not a life experience, but a thing that has to be done. I feel like a number at this point)
Me: Will you be present for the birth?
OB: Well it depends... the Dr.s work shifts, so it's unlikely that I will be working when you go into labour. The only way I can guarantee I will deliver the baby is if it's a high risk pregnancy and you need a c-section, or if you schedule a c-section before hand. Which reminds me, I almost forgot, I need you to sign this form. This just says you give consent to allow whoever is on call to deliver the baby. (Big Ol' Red Flag #4 - the very thing I wanted to avoid. I want to know and trust the person handling my baby for the first time. I don't care what you are on paper.. a stranger is a stranger! Not to mention, the bit about scheduling a c-section to guarantee she will deliver? No discussion or mention at all of the pros or cons of having an elective c-section? I hate to think of how many women just schedule the c-section in order to guarantee the OB will deliver; and that's a huge decision to be made without the proper information needed to do so... it's disturbing almost. )
Me: Um... can I take this home to read it?
OB: Unusual, but I guess you could just bring it back next time.

This is the form she wanted me to sign, without any proper discussion of why I would sign this, what it was - had I not asked her the questions I did, we wouldn't have even had the small conversation we did.
Unless the OB thought the 5 min. conversation we had just had was all we needed to talk about? Nevertheless, this scared the bejeesus out of me.

So I don't even have to go into the details of my first Midwife visit. We sat down for a long time and hashed it all out.. It was like night and day. No question in my husband and my mind what direction we are going in. And I feel SO blessed to have the opportunity to have my midwifes support. If people only knew how amazing the care is - I wish I could scream it from the rooftops!

I can't help but think about  how many women walk into that OB office and just sign away.. just do what they are told b/c they don't know any different. They trust the OB.. and why shouldn't they? what else do they have to go on that their experience could be so much better? How would they know that they have an opportunity to have a blissful birth experience? How would they know that they could have the choice not to be medicated; not to have counteractive drugs imposed on them potentially harming the baby? There is just TOO much that expecting mothers do not know. And I don't think OB's have any malicious intent.. not at all.. just that they are used to doing "business" in a certain way. But as far as I'm concerned, my baby's birth is not a business transaction.

I will be giving birth at a hospital under the care of our midwife who will be delivering our baby. I can walk around, and take my time if needed. I can give birth in a bed, or in a tub, or squat on the floor if it feels right! I can have music playing to calm me, and I am in a private room. I have choices!!! I know who is delivering our baby and I trust her. And should there be any complications, heaven forbid, I am in the right place to receive the care I need. Not to mention the 6 weeks aftercare that we will receive. For the first few weeks they will be in home visits. Can you believe the Midwife will come to us? - who wants to trek a newborn out and about right away anyway? It just makes sense.

This post is about my disappointment with the way a "life experience" is treated like a "medical procedure" in the medical community - and how that is conveyed to expecting mothers as such. It is also about trying to educate women. I am not judging anyone for choosing an OB. I am not judging anyone for wanting an epidural, or for whatever decision they make. But I can't stress enough the importance of making an informed decision!!! Who have you talked to to get your info? what resources do you have? take a look at both sides.. don't just ask your OB, or the people working in her office.. talk to mothers who have had all kinds of birth experiences. READ, watch movies like BOBB, call up a midwife collective and ask to have a meeting to get info. Talk to people online.. Have an open mind. The best gift we can give our unborn children is the gift of our own education.  Obtaining this type of education is FREE and EASY.  Afterall, we are being given the gift of bringing a life into the world.. how can we take that for granted? - It is our responsibility to make our children's journey into this world the best it can be.

***please note, that I do not intend to say that choosing an OB is a bad choice, or that all OB's shouldn't be trusted, that is certainly not the case.  I simply wanted to share my personal experience. The sharing of experiences can be the best form of education around.. and I do encourage everyone to share their stories, good and bad. Cheers :)

UPDATE: We did end up having a beautiful homebirth afterall! I wouldn't have changed a single thing about it. Natural birth is painful, but not like the media makes it out to be. That's a sure topic for another post ;) And now that #2 is on the way, we will without question choose the same route.

Sunday, February 5, 2012

A Special Announcement!

Our dog Watson helps us to make a special announcement :)

Tuesday, January 31, 2012

Sunday, December 4, 2011

The Scent of Happiness

Ah, December. The beginning of a season that is filled to the brim with all things magical. I become alive this time of year. The next couple of months are bliss for me, as my senses are tickled by sights, sounds and smells that have the ability to transport me to places, that sometimes only exist in my imagination.

The sense of smell is powerful. It can trigger a long lost memory of baking with your grandmother, that you didn't even know you had. Or bring you to that magical Christmas Eve midnight mass - when the incense burned silently as a marker of the excitement that lied ahead in the wee hours of the morning. Scent triggers emotion.. and during a time when the joy of the season can easily become lost.. I like to use scent as a tool to bring me back.

So here are some easy, inexpensive, natural tricks to get your home smelling magical for the holidays.

Pomanders
First used in the middle ages, where people would wear them on long chains (like jewellery) to ward off infectious diseases, and to simply smell better. Back then they were made of all sorts of crazy things. Today they are simply made of Oranges studded with Whole Cloves. Once made, they will dry out and can last for years as air fresheners, and even can be useful in linen closets and drawers to repel moths.

You will need:
1) A few confectioners scoops of whole cloves (purchasing whole cloves at a bulk food, is far more cost effective than buying them pre-jarred)
2) A few Navel Oranges of varying sizes

Simply push the cloves into the orange in any pattern that you please. You can completely cover the orange in cloves, or you may choose a design such as stars, or swirls. Or in the case of my brother's creation in the picture, you can't opt for the "Mr. T" pomander :)

Potpourri Crock Pot
Tossing a few spices and fruits into a crock pot (or regular pot) will fill your home with a warm Christmasey scent. It's dead easy, inexpensive, and is a great way to get rid of any fruit that might be starting to spoil.

What you'll need:
1) A couple of fruits of your choice, such as: Apples and Oranges - cut into slices or quartered (you can use anything from pomegranates to cranberries to pears.. it matters not.
2) A few cinnamon sticks, or a couple of tbsp of ground cinnamon
3) Some whole cloves
4) Some nutmeg
5) Water

Combine a random amount of these ingredients into a crock pot, or large saucepan; fill about 2/3 of the pot. Fill pot with water to about 3 inches from the the top. Simmer on low.
I've left this for a couple of days at a time; turning the stove/crock pot off at night, and when I leave the house - and refilling the water as it cooks off. 

Balsam Fir
Balsam Fir trees smell divine! If you opt for a real tree at Christmastime, you should get yourself a Balsam. It's true that Fraser Fir is the longest lasting tree, however nothing comes close to the scent of the Balsam! I'd say put off your tree trimming until 2-3 weeks before Christmas, so that you can take advantage of the loveliness of Balsam's fragrance.
If you do not use a real tree, that's still okay. You can still take advantage of Balsam's scent by grabbing up a few of it's branches to adorn your mantle, use for a centrepiece, make a wreath, or use in your outdoor urns. You can either buy these branches where ever you would pick up your tree - such as a nursery - OR if you have any friends or family who are getting a Balsam for themselves, ask them if you can have the scraps they trim off from the stump.

Little known facts about opting for Real Christmas Trees:
- More environmentally friendly
- Christmas trees are often grown in soil that no other crops can grow in
- The trees take years to mature; in the mean time provide habitat for wildlife, as well as clean the air
- When people are done with their real trees, they are recycled and used as mulch - where as fake trees end up in landfills
- Fake trees and wreaths are made from non renewable petroleum
- For every tree that is harvested, 2 or 3 seedlings are put in its place

Happy scenting! AND If you have any more Scent-sational tips, I'd love to hear them! Leave your comments below :)