Thursday, January 21, 2016

Easy DIY Fairy Crowns


My 3 year old asked for a rainbow tiara for Christmas, but we realized pretty quickly that a rainbow tiara that wasn't plastic is pretty hard to find. So we turned to Etsy to see if we could find something handmade, and basically decided that for what they were charging on Etsy we could figure it out ourselves and make something that suited our daughter's taste exactly.

So I set out looking for tutorials, and found a few and tweaked them based on supplies we already had, and set out to make it as easy as possible. This is what I came up with; here's how you can make your very own Fairy Crown.

What you'll need:


You'll begin by making a cardboard form for your crown to set on. Measure the head for which the crown is intended and cut your cardboard 1 inch longer. My daughter's head was 19 inches so I cut a 20 inch length and a 5 inch width to make it a bit wider than my lace. So I cut a 20" x 5" length.


I then made a cylinder and overlapped the ends by a 1/2" and taped it. I then covered the outside in the tape also to create a barrier so that the glue didn't saturate the cardboard.


Next mix equal parts white glue & water together in a container, and soak your lace for about 10 min.


After your lace has soaked, remove it from the glue solution and gently ring out the excess glue. Fasten the lace around your form and secure the ends with a tiny bead of hot glue.


Put your form and lace onto a microwaveable plate, I used a paper plate for easy cleanup. Place the plate and form into the microwave in 30 second intervals until the lace is dry. It took about 5-6 intervals before my lace was dry. Remove the crown from the microwave and use your paintbrush to paint another layer of the glue solution onto your crown and repeat this process until you have reached your desired stiffness. I found 3 rounds/layers of the glue to be stiff enough.


This next step can be omitted if you please. You might like the white, or you might be able to find lace that is already coloured. I chose a metallic paint, and I found that this step made the whole thing even stiffer. You will have to wait for this step to dry the old fashioned way or use a hairdryer, as you don't want to microwave your paint, especially metallic. Remove the crown from the form to paint it. the crown will become a bit limp again from the wetness of the paint.


Once you've painted the whole crown, you can either put it back on the form to dry, or take this opportunity to cover it in glitter like I did. This is the best time for the glitter because it'll stick to the wet paint.


Now for the best part. Once your crown is dry you can EMBELLISH it! With a glue gun I fastened a royal purple velvet ribbon to the base and some rainbow coloured jewels to the points.


We made a second one for her little sister, and I'm thinking I might want one of my own next. Making this adorable fairy crown is super simple, and it can be used for dress or dress-up!


Thursday, March 12, 2015

Travelling With Cloth Diapers?

Anyone who knows me knows that I am cloth diaper obsessed, specifically AppleCheeks cloth diapers. Cloth diapering is NOT what it used to be in our Mother's and Grandmother's time. Cloth diapering has come a looong way and has become a huge movement for reasons that are easy to understand; they are cost effective, environmentally friendly, very fashion forward, and highly collectible, and believe it or not cloth diapers actually have re-sale value - can you say any of that about disposables?


This post is not to sell you on cloth, because frankly I think they sell themselves, but to share with you my experience of taking our beloved AppleCheeks with us on vacation.

I will admit to you that before I faced my fear of travelling with our cloth diapers, I always used disposables for travel. My fear was lugging around a bag of poopy cloth in our car, or carry-on bag, or diaper bag. I used to think it was just easier to pack a few disposables and throw them away so I didn't have to deal with carrying the mess around. BUT then we were experiencing blow-out after blow-out in disposables, and well, I ended up having to pack extra sets of clothing, and carry around the poopy clothes anyway - which was more cumbersome than a couple of dirty diapers.

So I took the leap and decided to pack up our diapers for a recent trip to the Caribbean. 

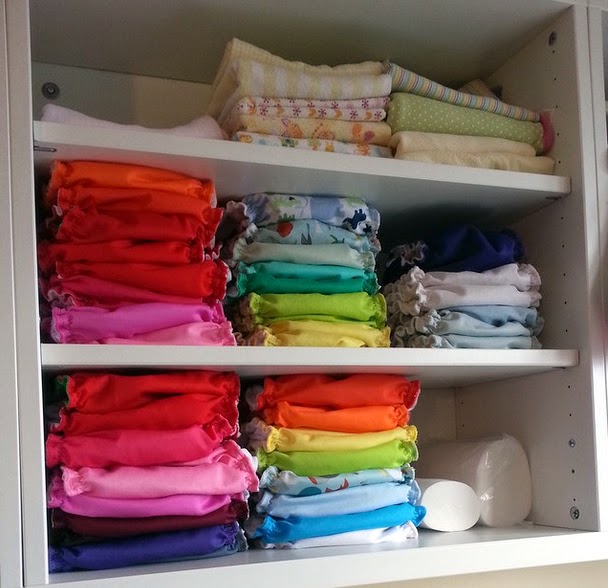
I Packed 15 covers in one wet bag, and 15 inserts in another wet bag. I had 2 in our diaper bag and left with 1 on our girls' bottom.
I also brought 1 large wet bag along to catch the dirty diapers at our destination as needed. 


18 diapers in total considering 1 wash cycle got us through the week with ease. As long as I have access to a washing machine were I'm headed, cloth diapering is a no-brainer now. It so so easy. 


And I don't mind saying that I think she was the cutest baby on the beach. That cute little number is called Appletini by AppleCheeks cloth diapers; she had her cocktail, and I had mine ;)


If I wasn't sold on the whole thing after going through the week with such ease, I was certainly sold after a question from another mom on the flight home. She asked, "how on earth did you find everything for your baby on the island? did you have trouble?".  My response? "I breastfeed and cloth diaper, I didn't need a thing!"

Want to try out AppleCheeks cloth diapers???
Follow us on Instagram for your chance to win 1 of 2 Little Bamboo Bundles from the AppleCheeks Easter release: First Crush and Crazy Love


Wednesday, March 11, 2015

Old Bench Turned Retro Kitchy Play Kitchen

DIY Retro Play Kitchen!

When our then almost 2 year old kept mimicking what I did in the kitchen by bringing us, and anyone who stepped foot in our house, make-shift tea and cookies (usually duplo blocks on a tiny tea set my Aunt gave her) we thought a play kitchen would be the perfect gift for her 2nd birthday. 

So we began looking at what was out there, and we were shocked by how expensive and low quality everything was. Such as these examples from Toys R Us, like this Plastic Palace for $350.00!

Or this low end one still expensive as heck for $120.00!
And let me tell you these picture make them look amazing! In store they look cheaper than cheap. AND have you ever seen these things after they've been played with? Marker and dirt that never seems to wash off of that cheap molded plastic, broken knobs, sun-bleached plastic, peeled off stickers... ugh I hate those things.. and honestly, if they actually cost what they are worth, then maybe I'd have considered getting one for our E. 

So of course hubby and I figured out how to make it ourselves. 
We had an old shoe bench we weren't using anymore and we did THIS with it.


I cannot begin to tell you how fun this was!

Not only does our daughter love it, it was super cheap to make, and it's so so cute!


I made her some play eggs from old plastic Easter eggs, felt, and an old egg carton


And these spice jars. I purchased a pack of six empty jars from the dollar store for $2, raided my spice cupboard, and whipped up these labels on the computer


I made the apron from fabric scraps and a vintage pattern I had, and the oven mitts from this free pattern from ikatbag.com. Here is a great free pattern from AestheticNest.com for an apron.
We grabbed a cheap piece of plywood for the back, and cut a hole in the top of the bench for the sink. The sink is a stainless steal mixing bowl that we had in the cupboard, that I think was originally purchased from the dollar store. 
The tiles, faucet, door pulls, shelf, towel rack and hinges we picked up from the Habitat for Humanity Restore for less than $20. Most of the bits and bobs we got from a jobber store called Active Surplus. We got really creative, like the stove elements are old computer tower fan covers, and the knobs on the oven are old UHF TV channel turners; these items we literally picked up for pennies. 
The wallpaper is vinyl tablecloth material that I picked up for $5 at a local fabric shop. 
The paint was probably the most expensive part coming in at $25 because I had my heart set on these vintage Tomato and Seafoam colours to compliment the theme, but you could absolutely use old paint you have lying around for free, or check out the mistake colours at your local paint store for a discounted price.
The rest of the accessories I picked up at the dollar store. Yes, I found measuring cups, tongs, a whisk, sponges, plaid washcloths to compliment my colour scheme, a mini frying pan, a mini pot, and a spatula all for $1 each! The teaset we already had (it's what started it all - from the Aunt :) )
The small appliances you see where purchased to go along with the kitchen for our daughter's birthday, and just happened to match our design.  
So I would estimate that when all was said and done, this beautiful, custom made, retro play kitchen cost us only about $75 to make, and lots of love :)
Now this is something we will have for years to come, and it's built to last. We are planning a few upgrades already, such as working lights for the fridge and oven!


If you're looking for a fantastically fun to make gift for a little on in your life, I can guarantee this will impress on a budget. 


Friday, May 9, 2014

That Darn Dirty Oven!

I've been letting my well-used oven become a bio-hazard. In not wanting to use any harsh chemicals, because they suck quite frankly, and not wanting to use the self-cleaning option, as it stinks up the not-well-ventilated apartment like a tire fire, I've let it get out of control. Like so bad that it actually caught on fire recently, ha ha!
I stumbled upon a cute little book recently - The Naturally Clean Home, full of lovely recipes for making your own household cleaners. Many recipes make use of essential oils, so not only are they effective, but they smell incredible too. It's a happy little book :)

Of course the book has a few recipes for oven cleaners - so I gave the following a try today:

Serious Oven-Cleaning Formula

  • 1/2 cup salt
  • 1/4 cup washing soda or borax
  • 1 box (16 ounces or two cups) of baking soda
  • 1/4 cup water
  • 3/4 cup white vinegar
  • 10 drops thyme essential oil
  • 10 drops lemon or lemongrass essential oil   
(You'll also need a spray bottle, some rubber gloves, and you'll find it helpful to have a scouring pad or some steel wool)
  1. Combine salt, borax, and baking soda in a plastic or glass bowl. Add just enough water to make a paste
  2. Remove oven racks and preheat the oven to 250ºF for 15 minutes, then turn off the oven and leave the door open.
  3. Carefully spread the paste on oven walls with a sponge or cloth and allow to set for 20 to 30 minutes.
  4. Combine the vinegar and essential oils in a spray bottle and shake well. Spray the oven walls and wipe clean. Rinse well.
With the help of some steel wool (that ended up looking like something you'd pull out of a clogged drain once I had finished) and some serious elbow grease (it helped me considerably that I accidentally broke my favourite tea pot this morning - so I had some pent up angst to use), I was able to get my oven pretty darn clean! Admittedly, it's not fresh-from-the-store clean, but had I a tad more time, and had I broken my Gramma's antique vase, it probably would have been close to new.
With absolutely no foul odor - in fact it smelled pretty darn good - and no irritation to my eyes or lungs or skin, and no harm to my asthmatic husband, my 1.5 year old daughter or fluff-muffin dog - I was extremely pleased with the result. See for yourself! 


If you pop over and visit us on facebook you can enter for a chance to win a copy Karyn Siegel-Maier's book "The Naturally Clean Home". Good luck!

Monday, October 29, 2012

Wool Dryer Balls Baby!

After having Evelyn I changed our laundry detergent to an environmentally friendly, baby friendly, fragrance free, phosphates free, hypoallergenic etc. etc. type - AND stopped using fabric softener. In doing so I lost what I love so much about clean laundry - the scent - and our clothes, towels and blankets became ridden with dog hair that was previously kept at bay by dryer sheets. BOOOO! So I went in search of a solution, and quickly found that people use Wool Dryer Balls in lieu.

Wool dryer balls are just that. A wool ball that you toss into your dryer with your wet clothes. The lanolin in the ball is supposed to soften the clothes naturally, and the balls act as an agitator to reduce drying time. I thought I'd give them a try to see if they worked on our dog hair issue as well.

Okay, I love these things! From different things I've read, it is suggested that you have 6-8 of them to actually do a good job, but in the pack I ordered I received 4 and they do the job just fine. Yes, our clothes are softer. Yes, the drying time is reduced. Yes, our pet hair gets wrapped up in the balls and not on our clothes anymore! Admittedly, they don't work as well as dryer sheets for the pet hair, but they're pretty darn good. I also get my scent back by putting a few drops of vanilla and tangerine essential oils on the balls - also not as fragrant as commercial perfumes, but natural and pleasant; it's not overpowering.
The only issue the balls do not address is static. But I'm willing to live with a bit of electricity in exchange for healthier laundry.

I purchased my balls from MiniMittens on Etsy - This is a crafter from Ottawa - so I also feel great about supporting a Canadian business too.

What a great gift these would make too; paired with a few bottles of essential oils - awesome!

To check out MiniMittens on Etsy click here
To check out MiniMittens on Facebook click here

Tuesday, September 25, 2012

Warming Quinoa Chili!

My good friend Ashley recently posted pictures of some Quinoa Chili that she had thrown together in her crock pot. Her picture looked so yummy, and with Autumn coming in like a lion this year, our house was in need of something hearty and warm to eat - So I asked her how she made it :) Here is her recipe, with a few additions of my own.


Quinoa Chili...mmmmm

2 tbsp EVOO
2 cups dried mixed beans (or two cans drained and rinsed kidney beans or whatever kind you fancy)
1 cup dry quinoa
2 sweet potatoes peeled and cut into chunks
1 large onion chopped
1 large zucchini cut into cubes
2 celery stalks chopped
3 cloves fresh garlic minced
1 cup chopped mushrooms
1/2 cup frozen corn
4 cups veggie stock
4 cups tomato sauce, or 2 cans diced tomatoes
1 13oz can of tomato paste
Chili seasoning to taste (I used 3 tablespoons)
Salt and pepper to taste

If using dried beans, soak them for 12-24 hours in advance (until soft or sprouted)

In a large pot, on med-high heat, add your EVOO, diced onions, minced garlic and chili seasoning - sweat your aromatics for 5 min or until they become fragrant. Do not over cook them.
Add your veggie stock, tomato sauce, tomato paste, beans, quinoa, and all of your veggies. Simmer covered on med-low heat for 4-5 hours, stirring occasionally. Simmer on low heat for an additional hour, stirring occasionally. Add salt and pepper to taste.

This can also be made in a slow cooker - cooked on high for 3 hours; then low for 12 hours.

Garnish with some grated sharp cheddar, and serve with buttered crusty French bread.
Even meat-lovers will love this Chili!

I finished this meal off with an amazing apple pie for dessert - recipe taken from The Pioneer Woman blog.. it's like an apple-crisp tart.. it's delicious! Check it out :)

Monday, July 23, 2012

Another Great Fabric Sale!

For those of you in Toronto area - or those who will be passing through sometime soon - There is a killer sale going on at "King Textiles" @ Richmond & Spadina, downtown.
They're moving, so prices are awesome - and if you can find Jonathan, tell him that Julia from The Retro Nest sent you; maybe he'll be able to help you with an even better deal on your loot ;)

It's only on until July 31st, so get you butts down there before they run out of the good stuff!